How to Create a New Virtual Machine in
Windows Server 2012
In today's article you will learn how to create a new Virtual
Machine in Windows Server 2012 without using VMWare.
Introduction
Step 1
First of all open your Windows Server 2012 and login using your
Administrator Password. Once you have logged in click on Start to select the
Hyper-V Manager to create a New Virtual Machine.
Step 2
As you enter in the Hyper-V manager on the left hand side you
will see that Hyper-V Manager is written. Right-click on this Manager, on
clicking you will get an option of "Connect to Server", click on that
option to proceed.
After that you will get two options that will
ask you about Virtualization Server. It can be your Local Computer or any other
Computer. Here I have selected the local Computer.
Step 3
Now you will see that a server is added just below the Hyper-V
manager. Right-click on this server and click on "New Virtual
Machine".
Now you will be asked to enter a name and
location for this Virtual Machine. After that click on the "Next"
button
Step 4
Now you will be asked to assign memory to this Virtual Machine.
You can specify an amount of memory as needed, here I specified
1512 MB. After that click on Next.
On the next page you can configure the
Network Adapter by clicking on the drop down button present in front
of Connection and selecting the option available or it will remain
Disconnected.
After that click on Next.
Step 5
Now create a Virtual Hard Disk so that you can install an
Operating System. After assigning the Name, Location and Storage Amount click
on Next Button.
Step 6
Now you must install an operating system on the assigned
hard disk otherwise after creating the Virtual Machine it will not work and
will give an error. For installing an operating system you can select the
second, third or fourth options available that includes:
1. Installing an
Operating System from a Boot-CD/DVD Rom.
2. Installing an
Operating System from Boot Floppy Disk.
3. Installing an
Operating System from a network-based Installation Server.
After selecting any of the available options click on Next.
Here I have selected the second option as I will install an
operating system using an image file.
Step 7
After installing the operating system click on the Next Button.
This will take you to the next page that will show you the full description of
what you had selected in the previous steps.
Now click on Finish. Development of Virtual Machine
will begin and it will be completed in a moment.
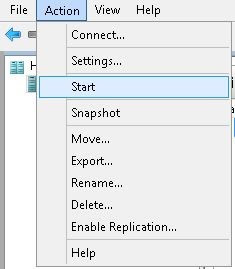
But still now this Virtual Machine is Off, to make it on
click on the Action button in the Tool Strip and from it start your Virtual
Machine.
Now your Virtual Machine will be started; just double-click on
it to use it.


No comments:
Post a Comment